Sunday, March 22, 2015

Left Unfinished

When I paint it usually means something to me, there's always a bit of therapy that I get out of it.  I've reached a rather philosophical point in my life where I think too much and do drastic things to reach new plains. Here's an earlier post ( Letting Go ) that's a good example of what I'm talking about. I'm always trying to understand my existence and be at peace with what life throws at me. I try to handle it with grace and refinement and try to find some deeper meaning or some lesson out of it. But honestly, some of life's little tricks are just plain unfair. Those are the hardest to resign myself to.

The concept for this painting evolved when I found a little toy anchor in a pile of garbage. I had been feeling sorry for myself at the time. See, I was going to be forty and I wasn't married, I didn't have a boyfriend, I didn't even have any prospective opportunities coming up. I have always wanted children, but I've seen how difficult being a single mom is first hand and that's not t he direction I wanted to go. I wanted to have a traditional arrangement before the children came. Unfortunately for me, I've never been all that good at luring the opposite sex into my vicinity. I know it sounds silly, and I don't understand it myself, but Men don't seem to like me much. Oh they like me fine as a friend or someone to have an intelligent conversation with, but when it comes to wanting me around permanently it just doesn't seem to stick. And it goes the other way too, some of them I didn't want around either. And I know what some of you are thinking, but I promise, if I liked Women I could have been married with a family long ago. Sometimes I wish I could swing that way, but I just don't. There's a point to this back story, really.

Now it's almost two years later and nothing has changed except the inevitable pre-menopausal signs have started. I've had to come to terms with the idea that children from my own body aren't going to come. I actually finished this panting once. The little anchor and the original painting (which I didn't take a picture of) represented letting go of those unseen babies. I painted a nude figure surrounded by beautiful colors of magenta, copper, and a variety of vivid blues. She is underwater, holding her breathe, watching all the magic happen around her. But, basically, she is drowning. It's absolutely gorgeous down in the world that she doesn't belong to, but if she doesn't let go she's going to die. To add a bit more texture, I added a tulle layer and the glue I used didn't behave and ruined the whole thing! Arghhhhhh! It's alright, the painting (therapy) did it's job, Children will not be born to me, I've let go and I'm OK.


I spray painted the whole thing black, it was a clean slate and the mood I was in. This picture is not all that great, but you if you look hard you can see the anchor with the figure blocked in above it. I got to this point and thought about what else I needed to drop so that I could float to the surface and breathe?  Men seemed the obvious choice. I could tell story after story of disappointment and WTF moments, but it's pointless and there's no sense to be made of it. When ever I meet someone that I'm attracted to I have the courage to let them know of my interest. This isn't happening because I'm shy, I'm a diplomatic person and only a bitch when absolutely necessary. I'm not broken from a previous devastating relationship. I have so much to offer and so much love to give. I'm emotionally healthy and I'm a grown up. That's why this is so unfair. I'm not perfect to be sure, but there's nothing seriously wrong with me. I thought that in order for me to be happy, I was going tho have to give up on the idea of being loved. (On a side note, I am loved by many wonderful friends and family and I cherish them all).  However, now that the new theme was decided, I was stumped. I haven't been able to do anything else on it.

It would seem that I'm not quite ready to give up hope yet. Hope is pretty painful at times but so is loneliness. I think I would rather hold the hopeful pain then resign myself to the pit of lonely despair.
 So I still have a painting that sits on my shelf with blurry lines, it does however have a rock solid theme. What if I made it represent the desire for things unattainable in general, like being able to breathe underwater or like becoming the first Queen of Mars? Maybe it just needs to be a shift in focus, like realizing who I am and what I really want. Or maybe it could represent being carried with the currant to new and wonderful places, trying and seeing new things.  I wonder if I just need to make it into a textured underwater scene with no meaning at all.

I wonder if I'll ever finish this painting.

And I think it may be to late to change what it really represents to me. Somewhere in the murky water is a man who is looking for me. I may let go and come up for breathe from time to time, but I keep swimming back to the anchor.  Hope glorious hope horrible hope.

Sunday, March 8, 2015

Corset #3 or I found my waist

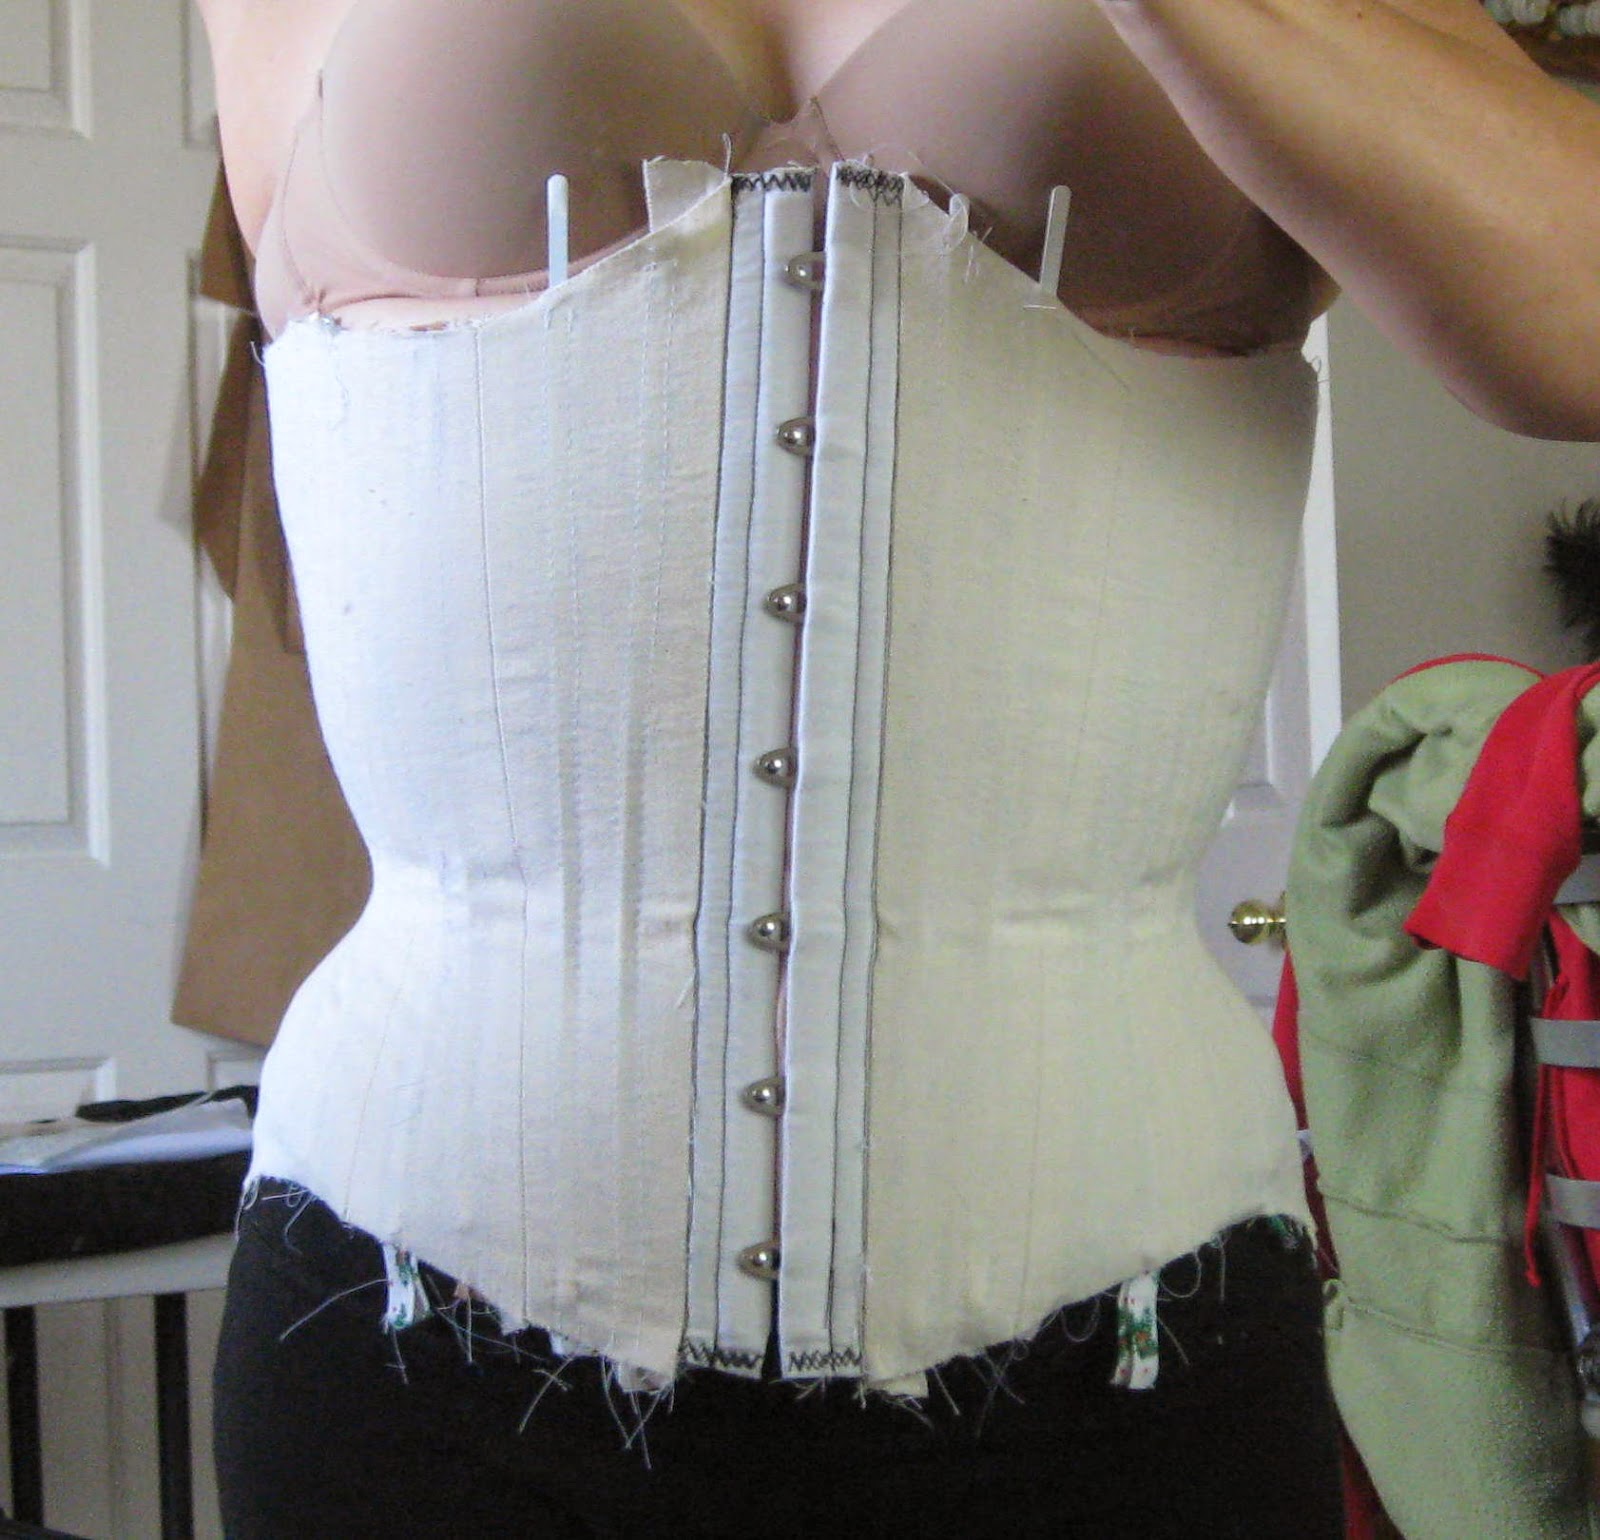
Understanding your body shape is so important and it's been one of my biggest difficulties ( though I totally rock other people's figures). While making the FR contest mock up I realized the waist tape put pressure on my hip bones, so I moved it up 1 1/4 inches and voila, I found the squish I was looking for. I also discovered that my pelvis tilts so my back waist is higher then the front. I took all of my new discoveries into account as I drafted my new under bust pattern.

This is what my mock up looked like for the last two under bust corsets I blogged about.


This is the new one. Quite an improvement in both shape and comfort.


I wanted to use up the rest of my black cherry silk , I'd used it for some of my final Etsy designs and thought that I'd put some of the pieces with this project for a whole set. I didn't have that much left so I cut this pattern down to make a cincher instead of a full under bust.

I decide to use a different method of construction on this one as well. It's called the flat felled or the welt method. To get started I put my layers together and positioned the waist tape in between them and then sewed in my bone channels.

This is the fashion side.


This is the inner side and strength layer.


This is a look at all of the layers used. I have the cherry silk backed with EK 130 interfacing (I like the tiny bit of stretch it allows). I put an inner layer of cotton sateen in to have a barrier between the silk and the heavy canvas (which is the third layer) so the bones have a more reinforced channel.


With the front panel done, I sandwiched the seam of the next panel by sewing the fashion layer on one side and the strength layer on the other. So it's basically finishing the seams by encasing them inside the corset. Every thing is attached this way, nothing is floating.


I added an invisible channel here.


Then I folded it over and roll pinned so that it would be smooth. This method allows for turn of cloth, so that the under layers don't bunch up when the corset is on the body.


I attached the next panel the same way and followed the process to the end. I also top stitched a channel into the seams as I went, thus creating the flat felled or welt seam.
You can see the felled seams that act as channels here.


I'm trying to use up some of the odd pieces of boning I have laying about, so the bones are in all different sizes. Some of them fit well and some of them are too long. I secured them with really ugly stitching so that I don't get any movement when the corset is done. It's not pretty but it's going under the binding any way.


The corset was now complete and I thought it was so pretty at this point, I took a picture. I love the way silk behaves under light and I love this color.


While sewing the binding, I skipped over those long bones and then went back and hand stitched between the machine stitches. I just caught the outer layer to the bias strip so that when the bias was folded over it looked right.


Then I pressed it to the other side and hand stitched the binding down. I like to hand stitch the binding, I think it's a cleaner finish, I don't like the way a machine stitch looks on the fashion side of the corset.


The last step was to put the grommets in and I was all done.

I laced it up and it didn't fit. I used drop cloth as my mock up material, it might have to much stretch in it. I think I need to start using the heavy canvas for mock ups so that I can be extra extra confident in the finished size. Also, stress makes me blow up like a balloon. Ha! We've all been there, I'm not to worried, and when life settles down I'll be less swollen. It's pretty and eventually it will be wearable.

Ok, so the things I'd change. In the front I think I cut it down just a little too much. Others might like it, but for me personally, I like it to be up to my bra line. I know that technically that's not a cincher. and I did only have a small amount available, so it was necessary to cut it down. I might need to work on this one a little more to get a shape I like. I think I'd also put some boning on the center front line.


The side view is dramatic and I like the slope. If I change the height of the front I might not. The side seam is too bulky for my taste and I know the pulling there happened because of that. If I use this method of construction again, I'm going to need a better strategy for the side seam.


I like the height of the back and I think the lower back works well with the frilled panties that I like to put with everything.  


I have to put flowers with everything. I love them, they're cute, and I think they're essential to my aesthetic. I put a matching flower with a slight contrast with this cincher. I think it looked better then one of a different color.


I made this to go with my shelf bra and sided frilled panties.
 It will be a fun set for ......well, anything really.

I'm not completely happy (ha! ridiculous perfectionist talking here), but as I've said before, I'm still learning and I think I'm getting there.


Saturday, February 28, 2015

I have nothing to wear

 I'm not much of a clothes shopper because I can never find what I want. I've been needing some new outfits, everything I have is either too fancy for everyday use or has been over used to the max. I'm either drop dead dressed to the nines or I'm a slob. I've been putting a lot of my time and money into getting my designs put together. So much of my fortune is in lengths of fabric at the moment. I need clothes, but I have no cash... time to liquidate some of my fabric stash. In the past, when ever patterns went on sale, I'd stock up. My thinking was that working with a fixed pattern would be easier then drafting my own. I had some lovely yellow vintage dotted swiss that I made into a dress from a vogue pattern I liked. It turned out so cute, but in the end there was a problem. I couldn't get the bias pieces to lay right on my body, no matter how much I fudged and fiddled with the piece. I gave it to Goodwill. (sadness and wasted time). Unfortunately this is a common occurrence. You'd think I'd learn. 

                So................
            
 I started from scratch. I decided to make my own basic slopers so that no matter what style I want it will fit properly. I didn't get rid of my vogue fitting pattern, I still opted for easy, haha. Two or three mock ups had to be made to get it right and I even ended up drafting my own sleeve because the one from the pattern didn't drape right. I don't think my body looks strange, but it sure is particular about how it wants to be clothed.


  I made sure everything was a fit by using old sheets to make mock ups. They're pretty aren't they?


I got an acceptable fit for the basic 5 but decided I'd go further with a dress block, some pants, and even a jumpsuit block as well.


I'm sure I'll still have to fiddle and fudge a little more, I've already made adjustments to the bust circle and the pants needed to be roomier. I'll keep working at it as I go, who knows, I may end up drafting all the pieces after all. I'm determined to get this right.


 Like any seamstress I have a rack and shelves full of fabrics and remakes. I've made it my goal to sprinkle my fun corset and lingerie making with designs for myself as well. I love vintage designs and quirky styles. I'm in need of some professional attire too. I'm excited to get started.


Monday, February 16, 2015

Raycie LaRaye Giveaway


***Raycie LaRaye's Giveaway***

Ok everyone, I want to start this year off with a Bang. If you all will help me get to 500 likes I will give away one of my Corset bras and two 50% off coupons for my Etsy shop, where you can use it on anything you want. I custom make my designs for any shape or size.

www.raycielaraye.etsy.com


The winner will be randomly chosen when I reach 500 LIKES on My FaceBook page. All you have to do is.....

Share this post with your friends....
LIKE my page....
and Please comment so I know you want to win. 


www.facebook.com/jilllaraye


Thanks Everyone and Good Luck!


Wednesday, January 28, 2015

Persephone Returns

My home is dreary, drab, and suffocating in winter. It too often looks like the picture below and when an inversion sets in it can stay for weeks at a time. Right about now I start climbing the walls... longing, aching, just dying for spring to come.


I often think of the legend of Persephone and how winter is the earth in it’s sadness. It’s withered because she has left. One of the things that helps me get through the rough patch of winter darkness, is immersing myself in beautiful art. Photography is the most realistic, but I prefer paintings. They draw out my imagination and pull me into their magical landscapes.


The textures and colors envelop me and soon all my senses are at work. I can smell the damp, life giving earth, the fragrant perfume of all the flowers in bloom, and the indescribable freshness of the air. I can feel that delicious air rushing down to meet my face and playing through my hair. I feel the coolness of the grass on my bare feet and the sparkling water on my toes. 


I can taste the sweet crispness of a mint sprig I've popped into my mouth and the refreshing chill of the clean water in the stream. I hear the chirping of the happy birds and the busy droning of the sun warmed bees. It all comes to me through beautiful paintings. It’s a reminder that Persephone’s woe won’t last forever, she won't be locked away forever, spring exists and it will one day be here again.
When I found out what the theme for the Foundation's Revealed contest was this year, it wasn't hard for me to come up with an idea. The execution of it, well, that's another story...so I'll get on with it shall I?

(Warning, this is the whole process..this is going to be a long post).

I decided that since this was going to be my masterpiece of spring, I would need a good sized canvas. I chose to make a body suit since it would give me the most surface area. I'd never made a body suit before. Now was as good a time as any to learn. 


I'm still relatively new to corset making, but I've had a lifetimes worth of experience with sewing. Patterns can be combined, so that's what I did. I used an under bust pattern I hadn't quite perfected and put it with a pantie I made a while ago. I then added an extension up into the bust.


I liked the look of the flat bust area (I don't really have much there anyway), so instead of wasting time trying to get a curve right, I decided to forgo that step. These pictures are not the final design, I did a little more tweaking after this.


This picture, however, is my final pattern. Rib cage rounded, waistline found, and tummy flattened. 
I  fused the two front pattern pieces so that it would be easier to make a continuous picture on it. I wasn't sure what the decorating process was going to entail.


Every Artist needs a vision, so I cut out a template of my pattern pieces and drew my idea out. I then gathered all the colorful bits of this and that around me for further inspiration. My ideas always evolve, so if you compare the end result with this you will see it's not exact. 
Seeing what you end up with is part of the fun!


All the preliminaries being finished, it was now time to cut out and get to work. I used an old cotton table cloth with a flora motif woven into it. I wanted to add as much dimension to the piece as possible. I cut the pieces out on their seam lines, but left extra around the pieces so I'd have a little to work with if I needed. I marked the pattern lines out with a fabric marker, it won't wash off during the dying process. Lastly, I used a product called Magik Batik that I got from Dharma Trading Co. to apply a resist for the areas I wanted to remain white. 
. 

Dying in progress
Oh.. I just LOVE Blue. Turquoise on the top and Sky Blue on the bottom.


After rinsing the blue out, I added green. It bled into the blue, which wasn't what I wanted, but it didn't hurt it. I was going for a water color type feel anyway. Magik Batik worked well enough, but I would suggest the real stuff if you need solid lines. I didn't however, so it was just fine for me.


Since I was making this a floating outer layer design, I needed to make that layer stable. What I've done a couple times before is to add a stabilizer to the back of the fashion fabric and then roll pin it to the strength layer. But, this needed to stand on it's own as a separate layer. The table cloth was flimsy and shifty, a little bit of fused interfacing wasn't going to do the trick. 
 I decided to make a SUPER FABRIC!. 
Here's the formula: 

Cotton Sateen with interfacing fused to the back.


Add Fashion Fabric and Fusible Web


Melt it all together into a super strong layer. 


See how those little marks from the fabric marker came in handy? I was able to put the pieces together just where they were supposed to be. 
Perhaps, this could have been done differently, but it worked out well, so I'm happy.


With my pieces now in a bionic state, it was time to add the other elements. The template that I made earlier became a pattern for my earth sections. I have an ugly taupe-ish blah fabric that I dyed with flecks of gold, green, and chocolate color, this became my dirt.


Dye reacts differently with different processes and fibers. I ended up with some burgundy pigment. 
I like to be organic in the design process, it's part of the evolution of it all. Even though it wasn't what I originally wanted, I just went with it, it adds more interest.


I decided to try something else organic and brought out the matches. I held the fabric over my craft room sink and lit up. This cloth is a silk wool blend so I knew it wouldn't melt the edges and keep it from raveling. I wanted to see what kind of finish it would produce.  It was smooth and dark, created a distinct line, and actually stayed rather solid (for awhile). 


I put the earth pieces where they were supposed to be and secured them with a small strip of fusible web. Just enough to keep them in place, the rest was held by seams. Now that the construction was done, I could finally start on the embellishment process.


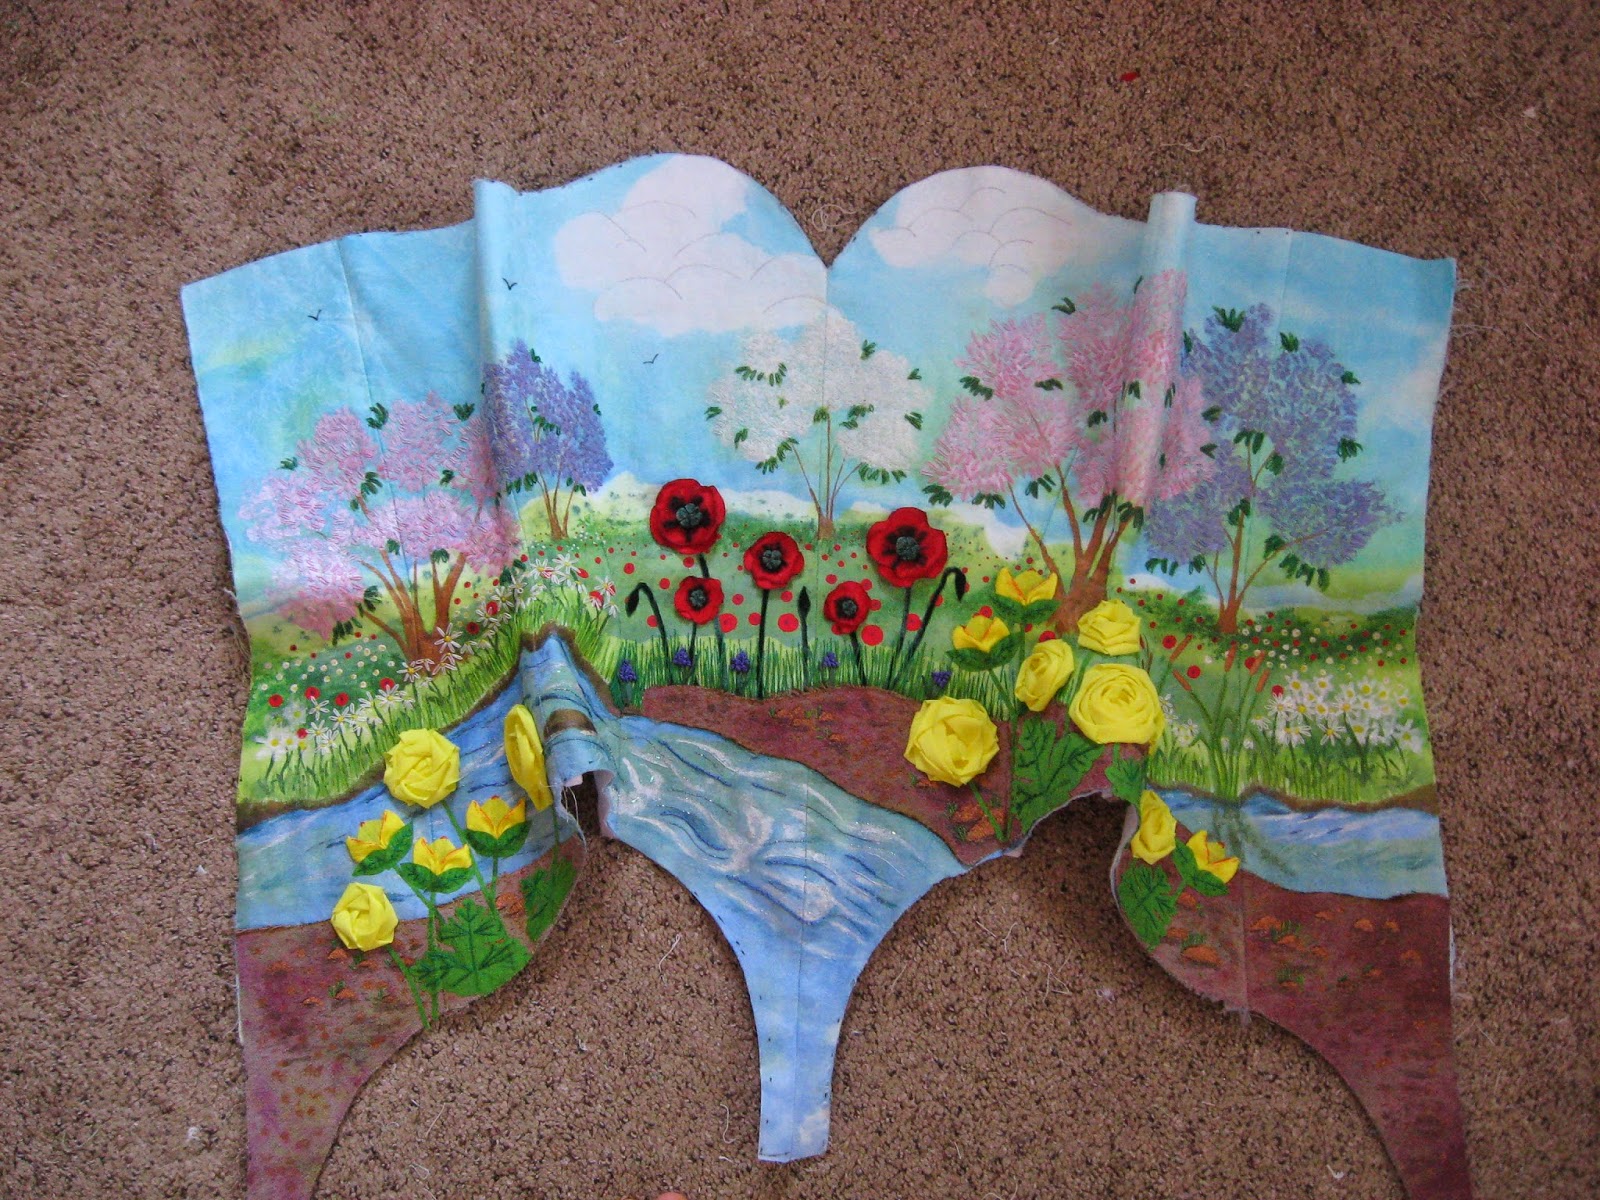
I know I told you that I love paintings, but I failed to mention that I also love to paint as well. This part of things was so much fun for me. I used Pebeo fabric paints. I usually just buy black, white, brown, and the primaries because mixing colors makes me so giddy.  Silly me, I get so much from color mixing. I could go on and on about it, but bless you all, I won't. Just look at the picture and we'll both move on.


The next step was to prep the layer for embroidery, but I also wanted to make sure this layer was strong enough to handle the stress of being worn. I double stitched all the seams, just like I would a strength layer. Then I added a little extra by fusing all the seams at the waistline. The last thing I wanted was for one of them to pop once it was all put together.


Let the lazy daisies begin. That's the stitch I used the most, it's rather versatile in it's representations. I'm not an experienced needle artist, I won't elaborate more. Haha. Pretty pictures, enjoy!

At this point I was starting to curse my choice of project, I think we all do it from time to time. My fingers hurt so bad and I was wearing bandages on most of them. It was good to finally be done with the embroidery.  You are probably wondering if the thickness of the fabric had something to do with it? No.... it was the amount I had decided to do and the lack of proper calluses for the job. 


I was so happy when I could start on the last part of the design. I found that my wimpy fingers where starting to toughen up, and it's always fun to finish and be satisfied with what you've done. So on to the next thing. POPPIES! I adore poppies. I've included every spring flower I love into this body suit. 
I started with a polyester satin that I cut into circles of varied sizes. I then clipped little pieces out to make the petal shapes. 


I went back to my craft sink to play with matches again. I melted the sides of the circles to keep them from raveling and kept the match close until it created the shape I wanted. 


I cut down one side of a black ribbon and unraveled it, then sewed it in a rounded fashion to the middle of two stacked blooms. 


I cut circles out of velvet and sewed around the edges so that it gathered into a little pouch and stuffed it with a tiny bit of fiber fill.


I sewed up through the middle of each little stuffed pouch multiple times... going each way until it looked like a poppy pod. Then I attached them all to the blossoms and then to the body suit.


Last but not least, the Roses. I used Heat-n-Bond for my applique work. The buds, the stems, and the leaves were all applied this way. I then reinforced it all with some more embroidery stitches. My fingers were tough now, I could do that. 


I cut out more circles (really round is the most beautiful shape) and folded them in half to make petals.
I sewed on the rounded edge and gather it slightly so they would tuck under when I put them on the fused buds.


I pinned them down and used an invisible stitch to secure them to the surrounding fabric.
I cut some more leaves out of the same green as the stems and used the same process to apply them. Finishing the buds off with a bit more embroidery. 


The full Roses where made with bias strips sewn down to some non woven stabilizer. You sew the end down and then twist and tack over and over until you're done. As if by magic a rose is created. It's so easy. Unless you're tired, then you need to take a nap and come back to it later.


I had a few more things to finish up...the grass, the water, and the little grape hyacinths.
But......it was finally finished!
I put it down for the day and went to a movie. 

Three weeks is what it took to get to this point.
I'm pretty proud of myself, I'm not going to lie. 


The movie was good, but now I could see the end of my project and I was excited to get it done.  I cut off  the excess fabric (that it turns out I didn't need, better safe then sorry though) and put the finished outer layer aside.


I cut out my strength layer and my middle layer. I decided to use the sandwich method for the boning and because my outer layer was so thick and my inner layer was my strength layer, I decided to use a thin cotton sateen for my middle layer. Since this is a body suit, the boning doesn't go all the way to the end of the panel, so I stabilized the bones with machine stitching at their end points.


My seam lines were finished for strength. I double stitched, trimmed and ironed to one side, and stitched down to be a mock flat felled/bone casing seam. I put two ½” steel flats at center front, six steel flats in the front panels, and distributed eight steel spirals around the rest of the body. I have ½” steel flats on both sides of the grommets at center back.


I put the waist stay in as I was sewing the body suit together. It is anchored at every seam, that baby isn't going anywhere. 


I attached the two layers at center back and used clear sulky for the top stitch thread. It blends in very nicely.


I decided to try it on at this point, which was a good move, because I couldn't pull it on over my hips. I had to take some of the back seam out and was actually amazed at how far towards the crotch I had to go to make it over my bum. 


Because I already had the boning in, I couldn't use my machine to put the two layers back together at center back, so I hand stitched them together. 
No problem, because I'm a pro at hand stitching now.


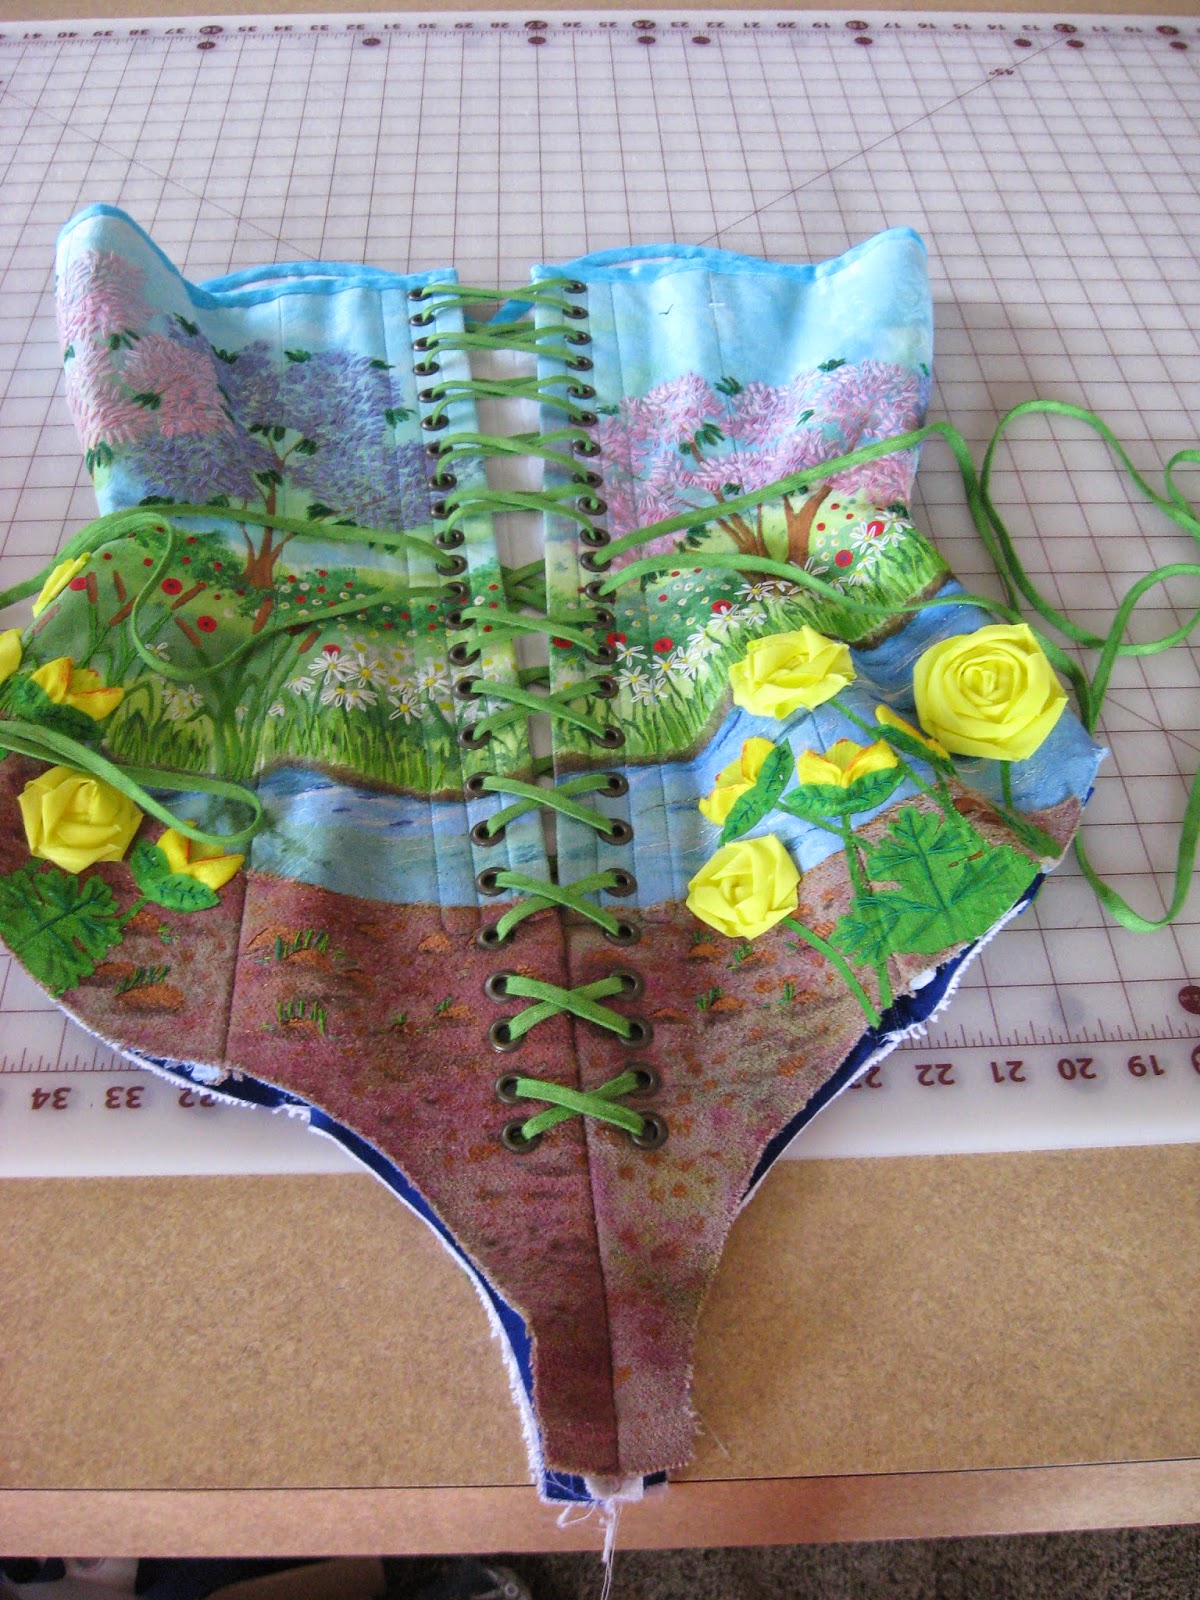
I put in grommets. Someday I want one of those fancy machines, but for now  the above system works great. I chose a bronze color grommet, I thought it looked much better then gold or white.


Grommets finished and top finished with a bias strip of turquoise blue cotton table cloth.
The big question of this whole project was "What color of lacing should I use"? Yes, that was the tricky part for me, who knows why.

Luckily I have dyable lacing so the sky's the limit.
Once I thought about it, green seemed logical. It goes with everything and hello, it's spring time. Green it was!


I put the laces in and sewed up the crotch seam. I tried it on for one last fitting and pinned the under layer to the outer layer so I could get the leg bindings on with no bubbling. I used blue and green bias to bind the leg holes. 

It's Finished!

Here's my Masterpiece, my Beauty, and my Tribute to Spring. 


Here's my Hope, my Distraction, and my Prayer to the Gods. 


That Persephone will escape her hellish prison.  That the world will be reborn. That I will feel alive again.


This was so much fun to make! Thank you Foundations Revealed for the motivation and opportunity to stretch and challenge myself.